

What is it about roses that has beguiled artists since the early Blue Bird Fresco created almost 4000 years ago? Why do so many oil painters love to paint roses?

If you feel compelled to craft your own rose masterpiece and some poor misguided soul seeks to dampen your enthusiasm with a statement such as ‘it’s already been done’ – look them in the eye, and with a twinkle in your own, cheerfully proclaim that with tens of thousands of species on this grand planet – not likely!
Ready to get started with the 5 steps to paint peach roses?

5 Steps to Your Own Peach Roses
Step 1
The background washes were painted in two basic steps – starting with thin washes of light value, cool color temperature blues and tans, and then adding some quick bravura brushstrokes to mimic leaves and ambiguous distant plants.
The cool bluish greens are meant to complement the orange and red (peach) colors of the roses. Using complementary color wheel opposites will help the peach roses pop forward toward the viewer while the background colors fade farther into the distance. It helps put much of the visual emphasis on the roses.
Step 2
When my background is created with abandon, focusing on fun rhythmic movement of shapes and textures with thinner transparent brush strokes, and meant to be done in one application and then left, I am much more careful with the initial drawing and hesitant to make major changes because of the complexity of recreating the spontaneous feeling that is created in those loose layers.
Unfortunately, this was a case of ‘the best laid plans of mice and men’. I soon realized I had placed the roses too close to the left side, which threw off the compositional balance, and would have left an uncomfortable tangent between a future frame and the farthest petal edge of my left-side rose.
So, using my paper towel, I said a tearful goodbye to those roses and began moving them to the right a bit.
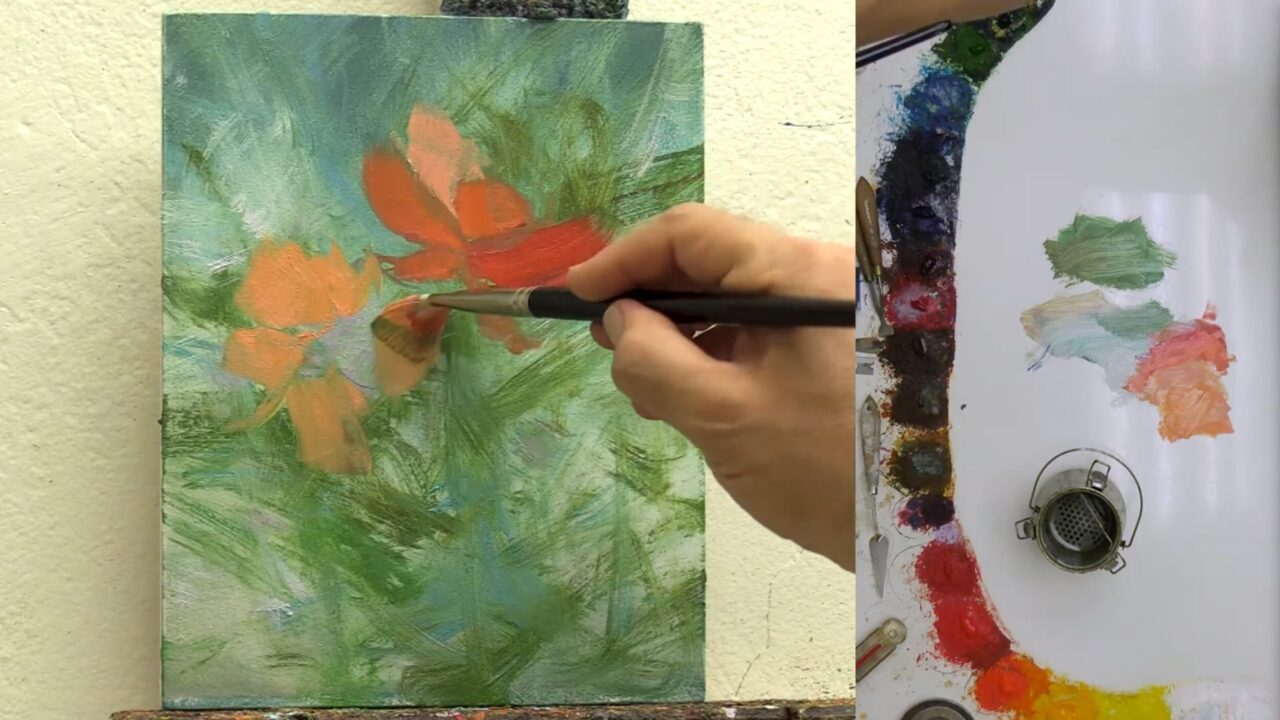
Step 3
Fortunately, most of the initial petals are shaped with single manipulated brushstrokes – placing a flower petal or leaf in quickly. I’m concentrating much more on visually exciting shapes than on making stereotypical roses or leaves. Using Flats for my paint brushes allows me to travel from a sharp point on the tip of a leaf to the widened center area and back to the tapered stem in one fluid stroke.
The rose colors are created primarily from a mix of cad yellow medium and quinacridone red in the more saturated darker middle value hues.
Notice at this stage that I am also playing with my darkest accents and my brightest highlights to establish my overall value range. I also begin adding a variety of stems, leaves and branches to increase the visual energy and movement in the painting.
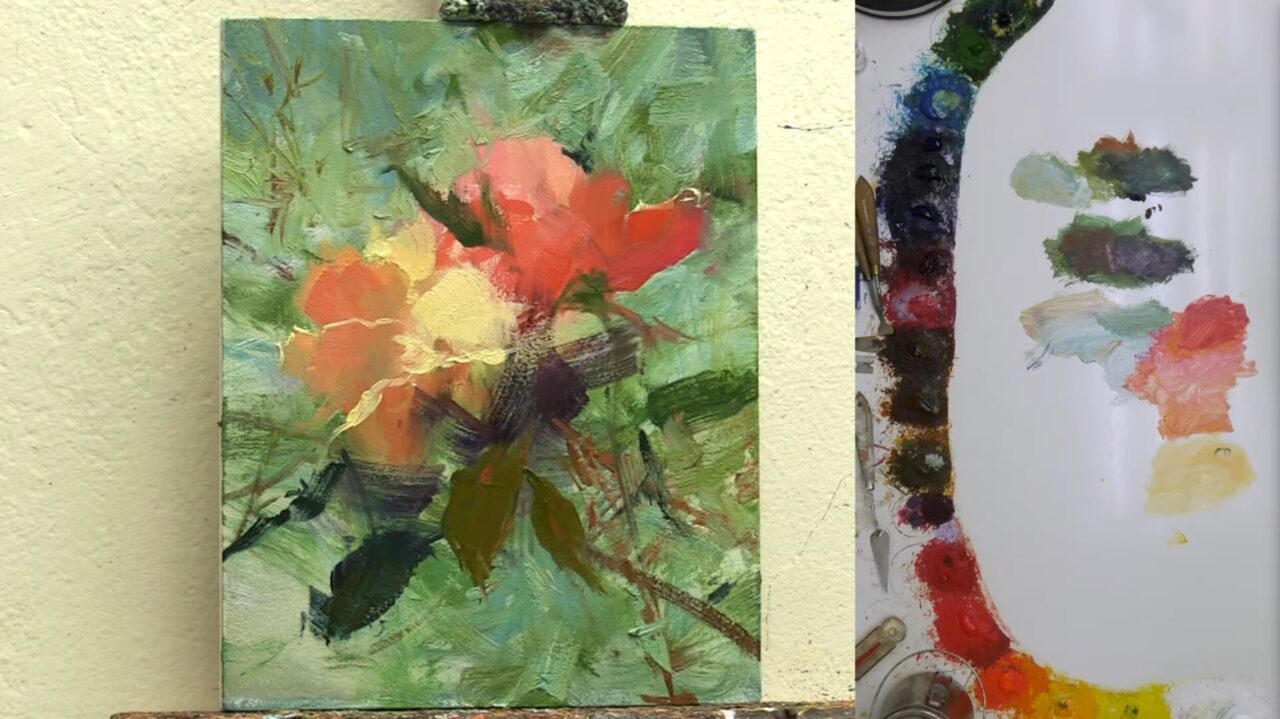
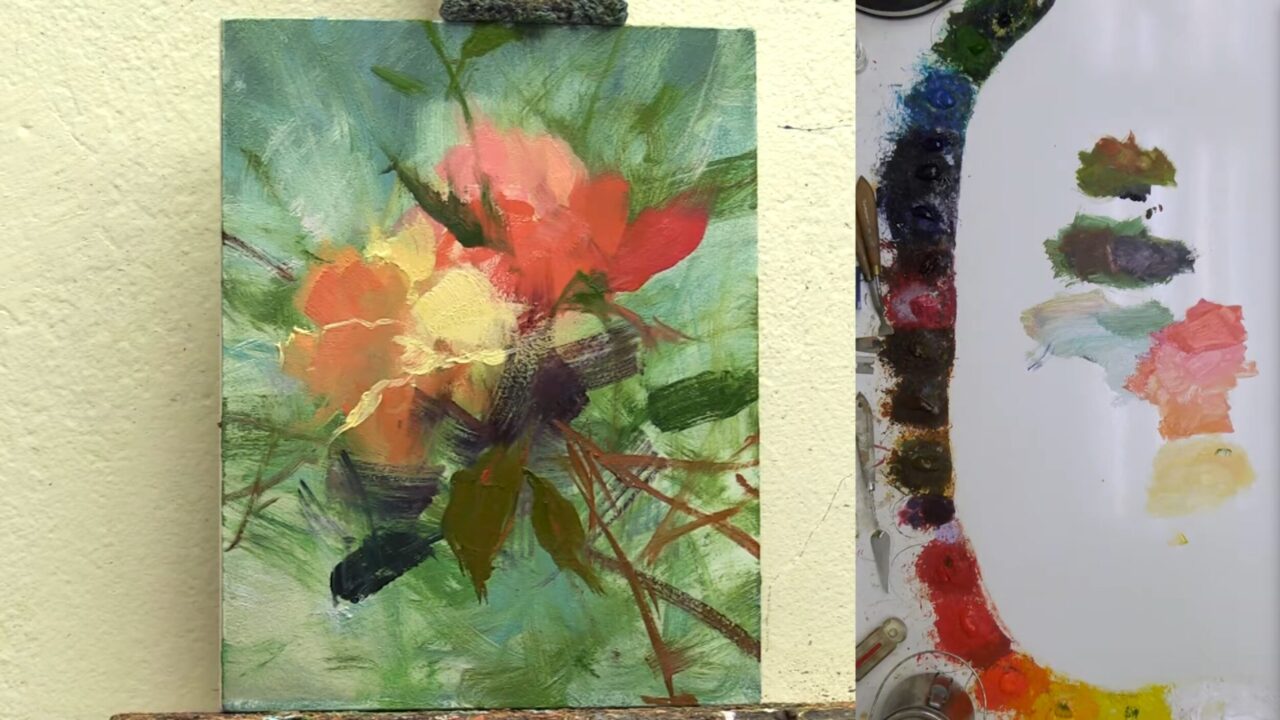
Step 4
Using much thicker paint to increase the textural appeal of the painting, I began to cut back into and shape the roses to enhance the delicate appeal of the petals and successfully separate one rose from the other.
One of the obvious and very attractive differences between oil paint and watercolor is the ability to correct mistakes. Oil painting does not require nearly the extent of preplanning that watercolor does – it is much easier to follow spur-of-the-moment inspiration and ideas.
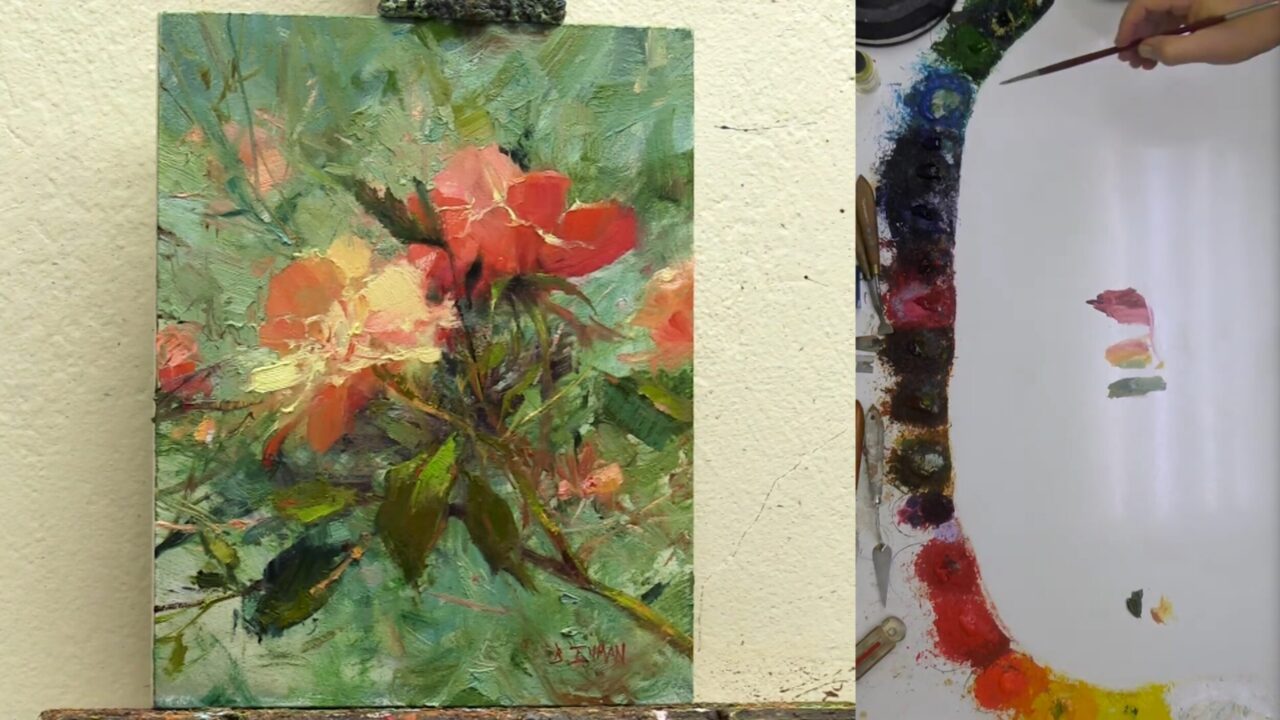
Step 5

Step 5 is all about the refinements. Once the major shapes and colors are worked out, the rest of the painting is simply a matter of playing with lines, accents, and highlights until the entire setting feels natural and engaging.
I love using a small pointed round or the thin edge of a flat brush to draw in wispy stems and tiny accents of strong colors like a splash of crimson to give the painting sparkle and depth.
How much we add or leave out is left up to the artist’s instincts and whimsy. There is no right or wrong; we all have unique personalities and interests. Go with your gut and have fun with it all.
An Oil Painting Rose Sanctuary
Do you ever dream of a summer sanctuary during the frosty winter months – roses cascading over cleverly trellised archways and arbors, fragrantly filling your thoughts with smiles of remembrance? We, artists, weave magic with our painted tapestries – magic powerful enough to transport the weary soul to that welcomed sanctuary.
Each rose painting was inspired by roses Kristie and I have grown around our home. Each year we try to plant some new flower that’s a bit different from anything we’ve planted before. One flower remains consistent – roses. I finally purchased some gloves this Spring for pruning those prickly bushes (they’re made of goat skin and are undeniably incredible – I gritted my teeth, grabbed a stem, and squeezed as strongly as I could – nothing. Not one thorn came through the tough hide. I can’t believe I went all these years without them).


Now let’s see the entire process from start to finish in a fast motion video to bring it all together:
Conclusion
I think it’s safe to say I’m slightly obsessed with roses, both outside and on the canvas. I know I’m not alone in my passion for this flower, but many artists still fear painting them. We recently published a 2.5-hour instructional video featuring these Peach Roses and dozens of artists let us know they were grateful because roses have been a tough flower to master.
Hopefully, the 5 steps above helped demystify the process and made you feel comfortable creating your own rose masterpiece.
If you’re a current Master Oil Painting Monthly Member, you can view the full 2.5-hour art instruction video that shows how to paint peach roses by logging in here:
If you’re not a Monthly Member and would like to view this video, along with the entire monthly training library, you can learn more here:
https://www.masteroilpainting.com/
What’s your favorite flower to paint?


wow thought it is diffficult
Painting is never easy Ina, but some paintings seem to flow more easily from start to finish. I do love flowers, they give me a chance to really have fun with color.
I just love the colors you used in this painting. So alive!!! Enjoy your videos very much.
Thank you Carol, this was a fun one to paint! I love to hear that you are getting some benefit from the videos.
Bravo,
Thank you Driss!
Watching the videos and listening to your comments: there is a joy in your work. I look forward to the videos and Webinars every month and try to incorporate some of your suggestions into my paintings. Thanks Bill(and Kristie) for all your time and hard work.
Thank you Richard, that’s exciting to hear! We were worried a bit when we started all of this because of the amount of time it takes to edit videos and put it all together – I don’t get to paint nearly as much as I used to. Hearing comments like yours keeps us going knowing it’s actually helping other artists.