

Hey artists! Do you ever wonder what paints and brushes you should buy?
Trust me, you’re not the only one.
In this lesson, I will share the art materials I use in the studio and when painting outdoors and try to describe why I use them so you can decide if they will also be useful for you.
A painful lesson from my early years:
When I was showing my work at the Pam Driscoll Gallery in Aspen, Colorado, I received a commission for a 50×30-inch waterfall painting.

With the Voice of Rushing Waters 30×40 waterfall oil painting by Bill Inman (this is not the unfortunate never-drying commission painting – this came a few years later.
I had just started using Turpenoid Natural to clean my brushes, but the container said it could also be used as a medium.
So, that’s what I did.
The directions said not to use more than a 25% medium-to-paint ratio. I used less than 10%.
It wasn’t overly slick to paint with, and the painting turned out beautifully. A week went by, and it didn’t dry, then two, then four. What was going on?
The internet didn’t exist in the early 90s. There wasn’t a book I could read. I started to panic.
Turpenoid Natural works fantastic for cleaning brushes and dissolving dried-on paint, but it is not a drying oil like Linseed or Walnut oil.
I eventually realized it was never going to dry, and I repainted the waterfall. It was a time-consuming lesson.
They no longer recommend their product as a medium!
That’s why I wrote this blog post – to hopefully spare you some of the trials and errors I’ve endured over the past 40 years.
How do we get past all the marketing hype? Many of us are counting our pennies so we can paint. We can’t afford to blow those pennies on art materials that aren’t essential or useful.
But please keep in mind something I shared with a new member recently:
Remember – don’t rush out and buy everything on the list. What works for me might not be exactly what you need. Use what you find here as the groundwork – then experiment and discover what works best for you.
You will see some repetition. I first put the information in list form for quick reading and added more images and details in the second half. Also, much of this list applies equally to plein air and studio painting. I will let you know when specific materials are only for one or the other.
The Basic Supplies – Links to Oil Paints, Brushes, Mediums and More

Oil paints:
Companies change, modify, or delete products regularly. Please let me know if any of the links stop working. Also, I’ve been using and recommending these products for many years. So, I recently set up an affiliate relationship with Blick Art Supplies and Amazon to help with all the expenses of sharing these tips. Clicking these links will never increase your costs, and I will only share those products I use. Not all products contain affiliate links.
Over the past 35 years, Gamblin has been the paint company I’ve used most consistently, but I’ve been experimenting with and adding paint from multiple companies. Gamblin, Rembrandt, Michael Harding, or M Graham brands from Blick Art Supplies or Jerry’s Artarama and Natural Pigments from their website are the paint brands I’ve used recently. There are many other excellent brands, like BlueRidge, Old Holland, Sennelier, etc. I just haven’t tried their paint yet.
One brand I avoid is Geneva. Geneva has clove oil added to slow drying. Clove oil is fine for slowing the drying of oil paint as long as it doesn’t get into the paint. Once in the paint, it can weaken the paint film, making it more susceptible to damage. I prefer the 150ml tubes of oil paint because the larger tubes are more economical when painting daily. If you paint only occasionally, you may want to buy the smaller 37- 40ml tubes.
Here’s what’s on my palette or what you will see in my videos (most of the time – remember, I experiment often):
- Titanium 150 ml / Titanium 37 ml (Gamblin) / Lead White #2 (Natural Pigments). I mix Gamblin’s PW6 with Natural Pigments’ Lead White PW1. I mix titanium and lead 50/50, or I use Titanium by itself.
- or Williamsburg Flake (Lead) White 237 ml can – (almost half the cost of Natural Pigments Lead White – but I have not used it)
Do not feel compelled to buy lead white. It’s expensive, and I used titanium white for over 30 years without any problems. I use it now because it is believed to strengthen the oil paint film, but it’s far from essential, and I may go back to using straight Titanium. Stay away from Titanium/Zinc unless, like Joy (one of our members), you’ve been using Permalba for 60 years without any problems. Zinc is known to cause embrittlement – i.e., cracking and delamination of oil paint.
- Cadmium Lemon 150 ml / Cad Lemon 37 ml or Permanent Lemon Yellow 150 ml Permanent Lemon Yellow 40 ml (Rembrandt) – (if you look for Permanent Yellow from other brands, the pigment is PY184 or Bismuth Yellow)
- Cadmium Yellow Medium 150 ml / Cad Yell Med 37 ml (not necessary, but I use it often. There isn’t a great replacement, but I can mix Permanent Yellow and Permanent Orange and get close.)
- Cadmium Orange 150 ml / Cad Orange 37 ml or Permanent Orange 150 ml / Permanent Orange 37 ml (Gamblin PO62) Permanent Orange 225 ml / Permanent Orange 40 ml (Michael Harding’s Permanent Orange PO73 is more red than Cadmium Orange, but I use it because when mixed with white, it is a beautiful rose color)
- Quinacridone Red 150 ml / Quin Red 37 ml (Gamblin) or Quinacridone Rose 150 ml / Quin Rose 40 ml (Rembrandt) (Gamblin PV19 or M Graham PR209 for Quinacridone Red)
- Quinacridone Magenta 150 ml / Quin Mag 37 ml (PR122)
- Alizarin Crimson Permanent 150 ml / Aliz Permanent 37 ml (PR177 is the most common substitute for the original fugitive Alizarin Crimson. Don’t use it for tints – it fades when a little is mixed with white, especially lead white. It works well for dark values. Most brands call it either by its chemical name, Anthraquinone Red, or by its descriptive name, Permanent Alizarin Crimson. Michael Harding calls it Alizarin Crimson Claret. Natural Pigments’ Alizarin Crimson is the original PR83 anthraquinone, considered fugitive and not very lightfast. I’m not sure why they would use PR83. I will reach out to them and ask since they are reliably knowledgeable, and I can’t imagine them selling a fugitive color)
- Cadmium Red Light 150 ml / Cad Red Light 37 ml or Permanent Red Light 150 ml / Perm Red Light 40 ml (Rembrandt) (if searching for Permanent Red with other manufacturers, Rembrandt’s is a hue (meaning more than one pigment), and the pigments are PR255 & PO73 or try Pyrrole Red Light PR254)
- Cadmium Red Medium 150 ml / Cad Red Med 37 ml or Permanent Red Medium 150 ml / Perm Red Med 40 ml (Rembrandt) (not a necessity – you can mix a decent Cad Red Med using Cad Red Light and Permanent Alizarin Crimson. If you look for Perm Red Among other manufacturers, look for PR255 or Pyrrole Scarlet)
- Yellow Ochre 150 ml / Yellow Ochre 37 ml (this is an example of how brands can vary: Gamblin PY43, Rembrandt PY42)
- Venetian Red 150 ml / Venetian Red 37 ml (this is another example of how brands can vary in pigment while keeping the name the same: Gamblin and Rembrandt PR 101, Natural Pigment PR 102)
- Transparent Oxide Yellow 150 ml / Trans Earth Yellow 37 ml (PY42)
- Transparent Earth Red 150 ml / Trans Earth Red 37 ml (Interestingly, this is the same pigment as Venetian Red for many brands: Gamblin, Natural Pigment, M Graham, and Rembrandt PR101)
- Ultramarine Blue 150 ml / Ultra Blue 37 ml (PB29)
- Manganese Blue Hue 150 ml / Mang Blue Hue 37 ml or Phthalo Blue 150 ml / Phthalo Blue 37 ml (Gamblin PB15:3 or M Graham PB15:4)
- Phthalo Green 150 ml / Phthalo Green 37 ml (PG7)
- Chromatic Black 150 ml / Chromatic Black 37 ml (Gamblin – a hue containing PG36 (Phthalo Emerald) & PV19) (it is a neutral, transparent black that is relatively inexpensive)
You probably noticed that next to each Cadmium color is a substitute. The only reason I’ve experimented with replacements is because there is only one Cadmium manufacturer, while there used to be two. Many countries are outlawing cadmium. So I figured it was best to be proactive while I still had access to Cadmium paints and could test a substitute side by side with a Cadmium color. The colors you see in the list are the best replacements I know.
Also, there are colors I avoid. One pigment in particular is Umber. The Umbers are oil hogs – they soak it up. They tend to dry matte, are susceptible to cracking, and are unnecessary.
For those on a tighter budget or wanting a lighter backpack, here is a list that will allow you to mix most of the other colors (37 ml is probably a good size as well):
- Titanium white
- Permanent Lemon Yellow
- Permanent Red Light (optional, but time-saving if you paint red flowers or fall leaves a lot)
- Quinacridone Rose (PR209)
- Alizarin Crimson Permanent
- Yellow Ochre (optional, but a relatively convenient and inexpensive pigment)
- Venetian Red (optional,l but a relatively convenient and affordable pigment)
- Ultramarine Blue
- Phthalo Green (yes, you can mix greens, but Phthalo Green will significantly widen your possibilities. It’s inexpensive, and a tube will last months or years because it’s potent; a little goes a long way. It’s beneficial for clear skies and ocean scenes.
Oil Paint Brushes:
Rosemary & Co. is my favorite brand. Wind River Arts is an excellent company for U.S. artists to purchase Rosemary Brushes.
I would suggest you begin with one of each brush series and see how you like it. Then, if it’s useful for you, add more sizes.
Hog Bristle Brushes:
Rosemary Classic Long Flat sizes 4-12 (8, 10, 12 are used most)
Egbert Bristle Brushes:
Classic Egbert sizes 0-6
Rosemary Masters Choice
Series 279 Long Flats sizes 4 and 6
Series 274 Flats sizes 3 and 5 (similar to Brights)
Ivory Riggers sizes 0-4
Canvas or Panel Materials
Canvas & Stretcher Bars:
#12 Cotton Duck 11.5oz (I buy raw canvas from Fabric Wholesale Direct)
#7 (7oz) cotton duck (Always buy duck canvas – other types are not nearly as durable)
Stretcher Bars: (Wholesale Arts and Frames has excellent prices on stretcher strips, and they are high quality)
While grabbing the website link, I saw their prices for pre-stretched canvases – WOW. I will order some soon to check the quality. If I like them, I will apply a coat of oil primer over the acrylic gesso.
Centurion (OP DLX) Deluxe Professional Oil Primed Linen Stretched Canvas
Kathy Rivera, one of our members, first recommended these to me. They are very nice pre-primed canvases.
The Edge All Media Pro Cotton Canvas
Several of our members love these and say they don’t have any sagging problems. I haven’t used them myself yet. They are very economical. Rick, one of our members, has started priming his with a coat of Gamblin Oil Ground and loves the smooth surface.
Panels:
I use a variety of panels, but my two favorites are MDF from Home Depot and ABS plastic panels.
The Home Depot MDF panels come in 2×4-foot sheets. They are uncommonly stable.
I suggest searching locally because buying ABS sheets online is more expensive.
I now prefer to glue canvas to the panels (especially MDF) just in case the panel gets damaged. Then again, I’ve sold hundreds of paintings on panels without canvas and have never had one returned.
Canvas/Panel Primers:
Gamblin Oil Ground, 32oz. For the 16oz can, click here: Gamblin Oil Ground. This is my preferred primer. It is easy to apply, has a smooth finish, and is economical compared to lead.
Natural Pigments Lead Alkyd Ground (This is also an excellent primer and dries within eight hours, which is extremely fast for a lead primer that can often take months to cure.)
Acrylic Gesso (Although I used acrylic gesso for 20 years, I now avoid it for oil painting.)
Gamblin PVA Size: (If you use an oil or lead primer on canvas, you must seal the fabric to keep it from rotting.)
Brush Cleaner:
It’s described as non-toxic, cleans and conditions brushes beautifully, and dissolves dried-on oil paint. I’ve been using it since the early 90s.
Painting Medium:
Walnut Alkyd Medium (When you need a painting to dry quickly)
Two other promising mediums I will experiment with (they just came in yesterday) are from Natural Pigments:
I don’t use a lot of medium or use it for every painting. It’s the exception, not the rule. I prefer to use paint straight from the tube.
Palette Knife:
RGM Stainless Steel Italian Palette Knife #050
The RGM palette knife I bought a few years ago is the best-made knife I’ve purchased recently.
Paper Towels or Rags:
Scott Shop Original box of 200
My go-to for 20+ years was Viva, but they downgraded the material. Now, I mostly use rags.
Paint Tube Wringer:
Gill Manufacturing Metal Tube Wringer
I have used plastic ones as well, but they eventually break. The metal Gill tube wringer is exceptional.
Palette Scraper:
Razor Blade Paint Scraper (I like and now use the long-handled razor scraper.)
or
Slice Manual Utility Scraper (contains ceramic rounded edge blade)
Plein Air Paintbrush Holder:
Earth & Fiber Co. Waxed canvas and leather paint brush holder for longer-handled brushes. It holds up to 20 large brushes, each up to 15.5 inches long.
Outdoor Plein Air Easel:
Blick Julian French Easel (this had better reviews than the regular Julian and is $60 less)
French easels are heavy and difficult for many artists to use. Mine was a Christmas gift when I was 16, and I still use it, especially since my large palette sits sturdily on the pull-out shelf. Unfortunately, French Easels don’t seem to be made as well today, so I’m unsure which brand to recommend.
If you prefer lightweight gear, go with the Leder Easel or research smaller plein air easels and palettes – there are a lot of them. They each have their strengths and weaknesses. I’ve experimented with many easels, but the small palettes and easels are too constricting for my painting process, so my gear is large and heavy.
Another easel that I’ve used, which was built solidly, was the Sienna. I bought it for smaller outdoor studies, but quickly realized I switched too often from small to large paintings and needed something bigger. It might be perfect if you want a smaller, lightweight setup.
Plein Air Painting Panel Carriers:
They are the best wet-painting carriers I have used! They are super tough and easy to transport.
Extra Art Supply Information and Pics (and some handy supplies, but not necessarily essential)
Paper Towels or Rags:

Scott Shop paper towels are superior to Viva for oil painting because they don’t deteriorate easily and don’t leave lint behind.
Scott Shop Original box of 200
My go-to for 20+ years was Viva, but they downgraded the material. Starting about 15 years ago, when I used Viva paper towels to scrub into initial washes, they left fluff behind.
Scott towels are tough and do not disintegrate or leave lint on my panels.
I mostly use rags. They are excellent for brush cleaning or wiping back into my paintings. Instead of giving away old clothes or towels, I cut them into squares while listening to a podcast or watching a training video.
Paint Tube Wringer:

Gill metal paint tube wringer. A good tube wringer will pay for itself pretty quickly.
Gill Manufacturing Metal Tube Wringer
I have used plastic ones as well, but they eventually break. The metal Gill tube wringer is exceptional.
Palette Scraper:

The long handle on this razor scraper is convenient. I have less of a tendency to get my fingers into the paint on my palette, and I can reach all around it easily. The downside is that the razor is not retractable. Notice the rounded edges on the razor. I sanded them so they won’t scratch my palette.
I like and now use the long-handled razor scraper. For decades, I used the shorter razor scraper, but I tried out the long-handled scraper a year ago and loved it. The only drawback is that the blade is not retractable. But I keep it on a magnet out of the way of fingers, so it works out beautifully.
Palette Knife:

A palette knife holder with eight palette knives, a compass, and a razor palette scraper
I have a large assortment of palette knives in multiple sizes and from different brands. Many are a decade or three old and no longer available. The RGM and Liquitex palette knives I bought a few years ago are the best-made knives I’ve purchased recently.
Outdoor Painting Palette:

A Panel Pak painting carrier modified for use as an outdoor painting palette.
I use a modified PanelPak or the Happy Painting palette Michael Schlee made for me. Since Michael no longer makes palettes, I would recommend a PanelPak because it is light and works well with the Leder palette holder. I’ll write a blog post about how I modified mine for palette use and post a link here.
Outdoor Plein Air Easel:

The French easel I’ve had since I was 16, and the custom palette I made. Michael Schlee crafted a much nicer and lighter Happy Painting palette for me, which I now use.

The Leder Easel is light, quick to set up, durable, and affordable. It’s a great easel.
French easels are heavy and difficult for many artists to use. Mine was a Christmas gift when I was 16, and I still use it, mainly because my large palette sits sturdily on the pull-out shelf. Unfortunately, French Easels don’t seem to be made as well today, so I’m unsure which brand to recommend.
So, if you prefer lightweight gear, go with the Leder Easel or research smaller plein air easels and palettes – there are a lot of them. They each have their strengths and weaknesses. I’ve experimented with many easels, but the small palettes and easels are too constricting for my painting process, so my gear is larger and heavier.
Plein Air Painting Panel Carriers:

Panel Pak is a painting panel carrier for plein air painting. They are amazingly tough and convenient.
One of my favorite Plein Air painting tools is the PanelPak carrier. I have about 20 of them in multiple sizes. They’ve survived dozens of trips, from the East to the West Coast, and not one has failed me. They are incredibly well-made.
I love that each carries two panels. They are easy to use and convenient for stuffing into a backpack or tossing into the back of a car.
Besides keeping my wet paintings safe, I can use the empty carrier as a visual frame for composing my painting design when deciding what to paint.
I highly recommend them!
A Good Hat:
I don’t know how many times I’ve gone off and forgotten my hat. My head does not appreciate that at all.

My favorite plein air painting hat – the Tilley Air Flo!
I love my Tilley hat!
Fortunately, the Tilley AirFlo comes with a lifetime warranty. And I mean lifetime! If an orangutan swings off into the trees with it or it fends off a bolt of lightning for me, they will replace it.
It can be scrunched up and stuffed into a pocket of my backpack, and when I pull it out, it’s good to go. It’s a fantastic accessory. I’ve had mine for about eight years, and by the looks of it, the hat might even outlive me.
They sold me when they told me about an elephant eating someone’s hat. A day or so later, they retrieved the hat without finding any damage to it (or to the elephant, I presume). Now, I’m not sure I would have waited to see if the hat survived being inside an elephant, but it’s good to know the hat is durable.
Backpack for Plein Air Painting Gear:

The Kelty Redcloud 90 backpack holds all my plein air equipment and then some!
Speaking of packs for my Tilley, the Kelty Redcloud 90 holds every bit of my equipment, some sustaining snacks, and still has room to spare. It is a very comfortable pack. I remember too many years of hauling my French easel hither and dale with just the handle.
The Redcloud 90 is no longer available, but since Kelty packs are well-made, I’ve linked their website so you can explore their new designs.
Don’t worry about a beastly pack like mine. Get a pack just big enough to carry whatever gear you take outdoors. Make sure it’s big enough for your palette and panel holders to slip into.
Ground Screws:

Orange Screws keep my plein air easel steady during windy days painting outside.
Another handy tool for outdoor painting is a pack of Orange Screws. They come with a clear plastic tube that easily slips into the handle to screw them into the toughest ground.
These screws are fantastic for those days when it’s stormy. With a bit of rope or a few bungee cords, these will keep your easel from taking flight.
At the Plein Air Convention in Santa Fe, they secured my setup while I painted right out in the open during a crazy windstorm (and I have the dirt-embedded painting to prove it :). My French Easel held its ground with no problem. The screws easily turned and sunk into the dry-packed gravelly trail.
Leak-Proof Container:

A leak-proof stainless steel container that is used to store oil painting medium
An airtight and leak-proof metal container for Turpenoid Natural, walnut oil, or mineral spirits – whatever you use to clean your brushes.
Indoor Studio Painting Supplies
My Palette:
I used an old enamel-topped table for more than 30 years. Occasionally, I hear of someone finding one of these in a thrift store or garage sale. If you see one, snag it – even if you don’t need it, a local art guild member will sing your praises for a lifetime if you offer it to them!

My oil painting palette is an old enamel table I’ve had for over 30 years.
What makes a white enamel palette worthwhile? The most significant benefit is that I can see my colors clearly and their values relative to a white surface, which is usually what I paint on. Don’t worry about the white vs grey palette debate. Plenty of successful artists use white palettes, including Norman Rockwell. His colors and values were amazingly accurate. Of course, if you prefer a grey palette, there’s nothing wrong with that either.
I’m now using a glass-topped table.
Why?
I couldn’t find an enamel top of the correct size. The glass palette dimensions make it easier for me to reach my camera to replace the memory card. That’s it. So, instead of my palette being 25 inches deep, it’s now 20 inches deep. Before, I kept getting my coat or a loose shirt in the paint as I reached over the palette for the camera.

Will I go back to the enamel table? Probably.
I’m not a fan of the glare the glass top reflects, and even though I have a white surface under the glass, glass always has a blue tint – always! I special-ordered this palette top from a glass shop because it had the least amount of blue I could find. Unfortunately, it still causes color distortions. I haven’t figured out why so many artists recommend glass palette surfaces; maybe it’s because enamel tops are harder to find.

Glass palettes also scratch easily. Yes, enamel also scratches, but the scratches are less noticeable when I’m mixing paint because they never go deeper than the white of the enamel and always appear bright. Scratches on a glass surface become noticeably darker in value than scratches on a white enamel surface.
Brush Holder:
My paintbrush holder is made from a commercial Rubbermaid 18×24-inch food container with a lid. When I place a Q-tip dipped in clove oil in the container and put the lid on top, it helps slow down the drying of the paint on my brushes, so I can continue using them during the next painting session.
I made a sloped holder to keep the brushes at an angle and placed a rubber mat on top to keep them from sliding down. I got the rubber mat from Harbor Freight.

My oil paintbrush holder is made from a commercial Rubbermaid 18×24-inch food container with a lid.
A Mirror:
A wall or hand-held mirror is essential.
Mine is on a wall about 14 feet directly opposite my wall easel. My neck stays quite limber from frequently turning to look behind me for a new perspective. This helps me ensure the composition, shapes, and values work in my painting.

The mirror I use for oil painting. It hangs on the wall opposite my easel so I can turn and get a different visual perspective while painting.
Materials like wall mirrors require a dedicated space, which can be challenging for a new artist. Remember, these are springboard ideas.
You can make a successful career in painting even when your situation is not ideal.
In our early years of marriage, I had to set up my French easel at the end of our long kitchen, beside the washing machine and the door to the backyard. Fortunately, a nice row of north-facing windows gave me beautiful light to paint by. And yes, I was selling my work in Santa Fe, NM, and painting full-time. Then again, I also painted outdoors a lot.
Canvas or Panel Materials
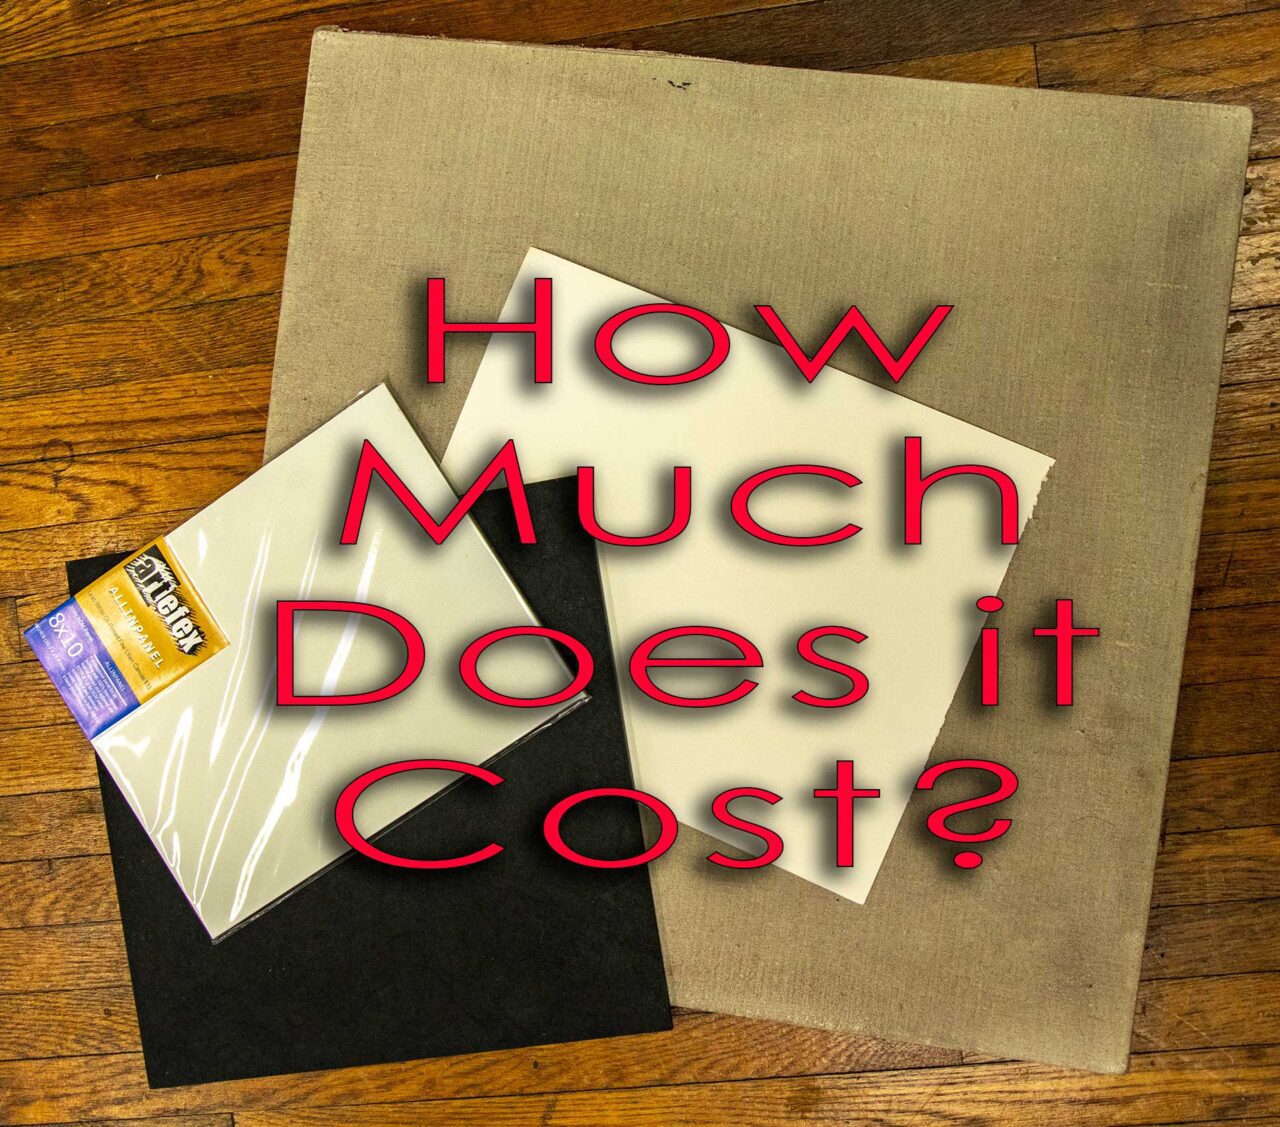
Stretched canvas, MDF panels, paper, ABS plastic, or aluminum (ACM) panels for oil painting. How much does each cost? I did an entire lesson covering these materials in depth.
Over the years, I’ve had a tough time finding canvases that didn’t sag or get wrinkles in the corners. So, I’ve generally made my own.
I’ll share the supplies needed to make canvases from scratch and what I use for panels. I’ll also include some pre-made canvases that I’ve used or that members have recommended, which don’t sag.
Canvas:
#12 Cotton Duck (11.5oz) I buy raw canvas from Fabric Wholesale Direct.
They have the best quality and prices I’ve seen. My favorite is #12 Cotton Duck (11.5oz). It is nearly impossible to rip or tear, no matter how much pressure you apply while stretching.
#7 (7oz) cotton duck is a recent purchase that I haven’t used yet, but the canvas seems strong.
Always buy duck canvas – other types are not nearly as durable.
Stretcher Bars: Wholesale and Arts and Frames have excellent prices on stretcher strips, and they are high quality. That’s where I get my stretcher bars for larger canvases that I decide to stretch, rather than applying them to a panel.
They also sell premade canvases, but I’ve not tried them because they are acrylic primed. While grabbing the website link, I saw the prices for the canvases – WOW. I will order some soon and then apply a coat of oil primer over the acrylic gesso. I will keep you updated!
Centurion (OP DLX) Deluxe Professional Oil Primed Linen Stretched Canvas. Kathy Rivera, one of our members, first recommended these to me. They are very nice pre-primed canvases.
The Edge All Media Pro Cotton Canvas. Several of our members love these and say they don’t have any sagging problems. They are also economical. I’ve not tried them yet. If you do, let me know what you think. They are primed with acrylic gesso. I prefer either oil or lead primer. Rick, one of our members, has started priming his with a coat of Gamblin Oil Ground and loves the smooth surface.
Panels:
I use a variety of panels, but my two favorites are MDF from Home Depot and ABS plastic panels.
I started using their 2×4-foot sheets in 2001; none have warped or twisted, even when moving from dry Colorado to humid Indiana.
Do not get them wet – moisture will cause the fibers to swell and ruin the painting or panel. Don’t rely on a coat or two of acrylic gesso to block spills or rain when painting outdoors – acrylic is porous, and moisture will soak through it.
Home Depot’s panels don’t contain formaldehyde. Avoid panels that do because the formaldehyde vapors will leak into your studio air.
Unfortunately, Home Depot’s panels have doubled in price since 2020.
ABS plastic comes in a variety of sizes. The most cost-effective size is 4×8-foot sheets. I order mine from Regal Plastics in Indianapolis and pick it up.
Many companies will make a few cuts for free or at a nominal cost if you need it in smaller sizes to fit into your vehicle.
ABS is incredibly durable. Throw it off the roof onto concrete, and there will barely be a dinged corner.
One downside is that plastic can become brittle in extremely cold temperatures, as can acrylic paint.
I now prefer to glue canvas to the panels (especially MDF) just in case the panel gets damaged. Then again, I’ve sold hundreds of paintings on panels without canvas and have never had one returned.
Canvas/Panel Primers:
Gamblin Oil Ground, compared with acrylic gesso, is a dream to paint on and much gentler on paintbrushes.
The downside is that it contains Gamsol mineral spirits (for those trying to avoid all solvents).
Natural Pigments Lead Alkyd Ground (or any professional lead primer) is the most recommended surface for oil painting. It has a lot of history behind it to back up its reputation. Conservation science believes that the lead pigment migrates up through the later layers of paint to strengthen and make the entire painting more flexible.
The downside is that lead grounds are more expensive and not as fluid and easy to apply as an oil primer.
Although I used acrylic gesso for 20 years, I now avoid it for oil painting. If that’s what you have, don’t hesitate to use it, since oil paint will adhere to acrylic. Oil and lead primers are so lovely to paint on that acrylic’s convenience is no longer enough to entice me.
Gamblin PVA Size is the best option to seal (size) fabric or paper to protect it from the acidic properties of oil paints and primers, which would otherwise rot the natural cotton and linen fibers. Unlike rabbit skin glue, which is hygroscopic (absorbs moisture from the air), Gamblin’s PVA size dries to a waterproof finish. Only one or two thin coats are needed to protect the cotton from the primer.
If you use an acrylic gesso, you do not need to seal the canvas, but make sure you use three coats.
Outdoor (or Plein Air) Painting Supplies
Easels and Palettes:
The French easel I’ve had since I was 16 and the custom palette I made (Michael Schlee crafted a much nicer and lighter Happy Painting palette for me that I now use.
My French Easel has been one of my faithful friends since I was 16. I would haul this back and forth from home to school for my high school and college art classes.

My French Easel – painting a barn and farmstead plein air on an old country road
This French easel has weathered over 40 years of rain, below-zero winters, desert sun, windstorms, and mountain trails. Well-built French easels will last a lifetime!
A wood craftsman in our Master Oil Painting community, Michael Schlee, designed a palette for me that works with either my French Easel or a camera tripod. I love that it is large enough to mix paint like in the studio.

The Happy Painting Palette on my French Easel while painting a beautiful farmstead outdoors in New York
As much as I’ve loved the French easel, I have experimented with other plein-air easels.
In the late 90s, I bought a Soltek Easel, but the plastic bottom panel holder broke within a year and would no longer stay in place. Even a replacement set I purchased years later broke in exactly the same spot. It was convenient, light, and quick to set up but couldn’t hold panels as reliably as my French easel.

New Soltek Easel with cracked plastic painting panel holder.
When I want to travel light, my go-to is the LederEasel. It is inexpensive ($160), built solidly of steel and hardwood, and sets up in seconds. It also weighs a fraction of the French easel.
Many artists use pochade boxes such as the Open M, and I’ve tried several, like the Craftech Sienna.
For me, though, I need a larger palette mixing area. I also like my palette at waist level, not crammed right under my painting at shoulder height. Freedom of movement to paint with gusto is more important to me than a lighter backpack.
Considering the popularity of small plein air easels and palettes though, other artists must enjoy painting with them.

The Leder Easel and the Happy Painting Palette on a camera tripod in my studio
Plein Air Paintbrush Holder
To keep my brushes in good shape, I made a couple of PVC carriers for traveling.

Homemade oil painting brushes carriers made from PVC pipe.
One is made with a 1 1/2-inch pipe for thinner handled brushes, and the other with a 2-inch pipe for my larger bristle brushes. The end caps are rounded, and they attach firmly to the pipe without glue. The top end is threaded, so I can easily twist off the cap and remove my brushes. I place the carriers in my pack with the bristles facing up, and they are fully protected.
They are also heavy.
A better alternative if you’re traveling by plane or just want a lighter load is a fabric brush carrier. I use the Earth & Fiber Co. Waxed canvas and leather paint brush holder for longer-handled brushes. It holds 20 large brushes up to 15.5 inches long. It’s beautifully made!

A canvas and leather roll-up paintbrush holder
Oil Painting Supplies – Necessities for Studio or Plein Air
Paintbrushes
Utrecht was my go-to for paintbrushes for many years. Unfortunately, they stopped making several of my favorite brushes. The same thing happened with the Isabey and Langnickel mongoose brushes I used for over 20 years. Rosemary & Co solved all of my paintbrush woes. 3 reasons I love their brushes: they make every style of brush I use, their prices are amazing, and they are beautifully made. Once again, experiment. There are a lot of excellent paintbrush companies to choose from today. You might start with a brush or two from different brands to see if you like them. It’s good to experiment and see what works best for you. Start with a local art supply store so you can see the brushes up close and get a feel for the shape and stiffness of the bristles, how springy they are, and whether they come to a sharp edge or are more bulky. Discover whether you like natural or synthetic bristles, long or short handles, large brushes for quick bravura work, or smaller brushes for methodical, intricate details. Paintbrushes are tools – find the tools that will create the results you envision. 
Rosemary and Utrecht Oil Painting Brushes:
Hog Bristles
The Utrecht series 103’s were my favorite brushes to make tree foliage and unpredictable marks with for several years. They are still handy brushes, but the Rosemary Classic Egberts have replaced them on my brush caddy. With the 103 series filberts, for some reason, I only used size 6. It seemed to be all I needed at the time. Once I started using the Rosemary Egberts, I found them excellent for small, careful lines and brushstrokes and for larger, vigorous scrubby leaf work. Now, I use several sizes. The Utrecht 209 series were excellent bristle brushes. They kept their shape and lasted for years. Unfortunately, they stopped making them. Fortunately, the Rosemary Classic Long Flats are a fantastic replacement for both the 209s and the synthetic/hog bristle blend 207s (which used to be my favorite brushes). Like the Utrecht 207s, the synthetic bristles in the Rosemary Classics can sometimes splay out. That usually happens because of my back-and-forth brush technique. They make such wonderful dry-brush textures that it’s worth an occasional bent bristle.  Larger sizes of the Classic Long Flats are the ones I use most often – sizes 8, 10, and 12. When I need smaller brushstrokes, I tend to reach for the Egberts or the Masters Series brushes. If you are on a tighter budget, you can get by with just a size or two of each brush. High-quality brushes can last for years, so just pick up another brush here and there as your budget allows. William Hook used only two sized 12 brushes for all his outdoor painting (he said recently that he doesn’t paint plein air anymore).
  The Rosemary Classic Long Flat brushes hold their razor edge beautifully. The synthetic blend with the hog bristles makes the brush thinner. They also seem to keep tighter corners over time rather than becoming filberts. The synthetic bristles also work amazingly for dry-brush texture effects.
Masters Choice – Mongoose Replacements
The Masters Choice brushes are wonderful. Sable brushes are too soft to get the textures I love in landscape painting. Then again, bristle brushes are sometimes too stiff and rough for certain textures. The perfect go-between were the Isabey and Langnickel Mongoose hair brushes, like the 6158s and the 5590s. Mongoose hair is a perfect balance between the softer sable and the stiff hog bristles. Then Mongoose hair became illegal, and the Langnickel and Isabey brushes mostly disappeared. When I found Rosemary’s Masters series brushes, I said a prayer of thanks. They are made with badger hair but act just like the Mongoose. The longer bristled 279 series brushes are handy for softening an edge or adding smaller branches. They are also fun for scruffy foliage, similar to what the long Egbert bristles do. The difference is that the bristles on the 279s are spaced farther apart, which allows for some wonderful broken-edged brushstrokes. One of the major weaknesses of the Langnickels was the tendency for the bristles to fall out. Rosemary’s do not have that problem – no more loose hairs in my paintings!
Ivory Series
When you go to Rosemary’s website, you will probably notice the great reviews the Ivory series brushes get. I know a lot of artists that love them. The first time I tried them, they didn’t work well for me because I tend to push and pull the brush while I paint. That pushing technique splays out the synthetic bristles and ruins the sharp edge. Recently, I began experimenting with them again and absolutely love the Riggers for branches and lines that require controlled thin applications. I pull the brushes, and the bristles don’t splay. When I need to push the brush forward for random foliage, I reach for the Classic Egberts.
Final Thoughts About Brushes
If you want to shop with just one company, I would go with Rosemary. If you live in the U.S. Wind River Arts is a great place to buy Rosemary brushes because you save on shipping from England. Wind River Arts is also run by a wonderful couple who love to help artists find high-quality art supplies. I bought a bunch of the Jack Richeson Grey Matter hog bristles. I was excited about their grey ferrules to help eliminate glare when filming my painting process. The brushes are made well, and the handles are nice and long, but the bristles are grouped thicker and don’t come to a sharp edge like the Classic Long Flats. The bulkiness of the bristles also makes them tough to clean because they hold a lot of paint inside. The brushes would work fine for specific techniques, like the initial block-in of a painting. But I prefer one large brush that can do whatever I need it to: from detailed lines to large abstract shapes. Another strong contender for the ‘Mongoose’ replacement brush is the Raphael Kevrin 867 Round. They are very well-made brushes that I picked up at the Plein Air Convention in San Diego. They are pricey, though, and the sizes are smaller than the number suggests. I like that the Kevrin Round series brushes come to a sharp point and hold up well. Be aware, though, that the bristles of the size 12 I purchased are almost 1/4 inch shorter than Rosemary’s Series 272 size 6, and the handle is about that much shorter as well. Another reason to buy one brush at a time and experiment with different manufacturers.
Oil Paints
In the late 80s, I started using Utrecht and Gamblin paints because I liked the big 150 ml tubes (which I still use today). Many artists buy the smaller 35 ml tubes. Occasionally, I tube my own paints (I teach how to fill paint tubes in-depth within the Master Oil Painting 6 Week Course). When I’m painting every day, it’s a great way to save money on paint. With my teaching schedule now, I prefer to buy my paint ready to go so I can save that time for painting, but I still tube certain pigments, like the Titanium/Lead white mix.

tubing paint
My palette contains a warm and cool version of the major hues and some earth colors. Warm, for me, means the color tends toward red and cool toward yellow. Ultramarine is warm because it is redder, and Phthalo Blue is cool because it is more yellow. Some artists think yellow is warmer than red – it doesn’t matter as long as you know what works for you. For members, I am creating individual videos that dive deeper into each color I use and why. Stick with professional or ‘artists’ grade paints rather than student-grade alternatives. The student-grade paints use a lot of fillers to compensate for the lower pigment content (the pigment/color is the most expensive part of the paint). The student-grade paints can work well for some subdued styles where vibrant color isn’t a priority. Gamblin is my go-to oil paint brand. They have many of the colors I like and are of exceptional quality (and they were the most convenient paints to buy 35 years ago). Each color I use is at the top of the charts for lightfastness. The way I look at it, there are so many colors available that are listed as a ‘I’ on the lightfast range, why mess with less-lightfast colors. How can you tell if it’s at the top of the lightfast range? Most brands will show the lightfastness level on the label. Winsor & Newton does not have either the pigment or the lightfastness level listed, which is frustrating, but Gamblin, M Graham, Michael Harding, and Rembrandt each list the pigment/s on the label, and all but Rembrandt list the lightfastness level. Michael Harding doesn’t use I, II, or III; he uses Excellent, Very Good, Good, and Not Tested. You will need to look at some brands’ websites to find that information. Stay away from any fugitive or questionable materials. I don’t want my paintings peeling off the panel or severely cracking after a collector has purchased them. Titanium White is a good example. Many manufacturers list their white as Titanium but then list a mixture of titanium and zinc in the pigment description. Zinc has a tendency to become brittle and crack when used in oil paint (it’s fine in watercolor or acrylic). It can also delaminate (peel off) over time. I have 3 ‘cool’ reds on my palette – Quinacridone Red, Quinacridone Magenta, and Alizarin Crimson. Why? That’s a bit of a story. The short of it is that I tried to make a clean specific lavender with Alizarin Crimson and Ultramarine Blue, and it didn’t work. When I mixed some old Rose Madder Genuine with Ultramarine Blue, it made a beautiful lavender. The problem is Rose Madder is a fugitive color, which I didn’t know when I was using it. After a bunch of research and experimenting, I found Quinacridone Red. I thought I would just replace the Alizarin with the Quin Red, but the Quin Red is not dark enough. Alizarin mixed with Ultramarine Blue makes a fantastic shadow base – rich and dark. Recently, I tried out Quin Magenta. It shifts more towards blue than Quin Red, makes beautiful lavenders, and is darker in mixtures. Is it essential? No. But it’s one of those colors that I just like, so I keep it on my palette. Some colors are essential to help me create the range of colors I want, some are convenient, and some fall into the category, “I don’t know why I use it; I just like it!” When looking for Alizarin Crimson, get a ‘permanent’ formula. The original Alizarin is considered fugitive and can crack or fade dramatically, and yes, some manufacturers still produce it. Richard Schmid gave a lecture at the Bennington Center for the Arts in 1998 that I attended and told about his Nancy in a Velvet Dress painting. The dress had been created almost exclusively with Alizarin Crimson and, within 5 years, began to crack excessively. He was working with conservators to try and fix the painting a collector had paid $150,000 for. The Transparent Oxide colors I use are also called Transparent Earth, depending on the manufacturer. Transparent Oxide Yellow is a transparent substitute for Yellow Ochre. Trans Oxide Orange replaces Raw Sienna, and Trans Red replaces Burnt Sienna. I’ve been using them since the mid-90s – they are some of my staple colors. Phthalo Green is powerful – use it sparingly. The reason it’s on my palette is it makes incredible mixtures with all the primary colors.
Oil Paint Brands
Gamblin has the most complete selection of the colors I use – if you want to go with just one company, that’s who I recommend. A while back, I tried out the RGH and Michael Harding brands. Michael Harding’s paints are wonderful – RGH did not work out as well for me. Stapleton Kearns loves RGH, so they may be a good option for you. Some of their colors are overly oily for my painting style, and their white takes 2-3 times longer to dry than Gamblin’s. Who knows, I may try them again sometime in the future. The Ultramarine Blue and Quinacridone Red from Michael Harding paints I purchased are smooth and highly pigmented. They cost a bit more, but the oil content is spot on, making the paints flow beautifully right out of the tube. M Graham & Co paints are also excellent. They are made with a walnut oil binder rather than linseed oil, which is a big plus for me. Unfortunately, they do not make Cad Lemon, one of my essential colors. Watch their Titanium White – it’s made with zinc. Rembrandt paints are buttery and flow well, meaning they have more oil than some brands. I like that. Other artists do not. You need to experiment to find what works best for you. Experimentation is important, so I will continue trying other brands and colors. Remember that colors and values of paint can vary quite a bit by brand. Gamblin and Utrecht make Sap Green, but as you can see, they don’t look the same. I use Gamblin’s because it’s much darker and works well to create some of my shadow colors.

Gamblin and Utrecht Sap Green comparison. I prefer the darker Gamblin Sap Green. They are both permanent, lightfast mixtures.
Oil Paint Prices
Here is a list I put together of paint prices by brand. Prices have changed since this was compiled in 2015, but it gives you an idea of the cost differences per ounce. 

Other Art Supplies I Use
Mediums and Brush Cleaners

M Graham Walnut alkyd medium, Winsor & Newton Liquin, and Gamblin Solvent-Free Gel medium. I’ve tried each of them, but prefer the Walnut Alkyd Medium.
M Graham & Co Walnut Oil or Walnut Alkyd Medium
Here’s something I wrote to Carol recently in response to a comment on one of my YouTube videos:
I experimented with walnut oil for a couple of years to block in my paintings but found it too slick and not especially fluid. On a whim one day, I just began putting paint on my canvas/panel straight from the tube – literally squeezing each color onto the panel.
It was a 40×30 canvas of a trail leading up through aspens.

Pathway to the Rockies 40×30 inch oil painting by Bill Inman
The paint was too thick for my brushes to move the paint around effectively, so I used ceramics/sculpture tools and chopped-up credit cards. I’ve had a lot of experience working with thick paint, but it was still a challenging problem-solving mess I had gotten myself into.
I was flying from the seat of my pants, following my instincts. The result was amazing!
I now employ the technique to one extent or another in all of my paintings.
The colors were vibrant and rich without the glassy gloss I get from mediums like Walnut Alkyd Medium when I use too much. Using the ceramics/sculpture/credit card tools, I covered the panel pretty quickly.
Finishing the painting wasn’t especially quick because I was learning what to do and how to manage all of that paint in a way that would be interesting and believable, but the experience was fun and opened up all kinds of texture possibilities.
Paint straight from the tube gives me the best results so far in terms of gloss and quickly covering the white of the canvas, but I have to use plenty of paint early on, or it greatly slows the process.”
Painting mediums are technique and artist-specific. We are each unique in temperament. We can’t tell if a medium will work for us until we use it.
Just because an artist we admire swears by a particular medium doesn’t mean we will also love it.
In the membership and courses, I have a video that goes more in depth into mediums, but here are a few tips: If you are painting on a water-based ground like acrylic gesso, be careful how much walnut oil you add to your washes.
If it beads up – you used too much. Oil on acrylic forms a mechanical bond. It needs plenty of ‘tooth’ to catch hold. Too much extra oil saturates the tooth and doesn’t adhere well.
In that case, just wipe it off and start over, or add more pigment and paint into the area. Acrylic is porous, and those tiny holes give purchase to the oil binder. If those tiny holes fill up, the oil has nothing to grab onto.
Turpentine and plant oils (walnut, linseed, poppy, safflower) are superior to mineral spirits for initial block-in washes because they dry glossy like wet paint.
Mineral spirits evaporate too quickly, resulting in flat/matte colors and distorted values.
Unfortunately, turpentine is toxic. The fumes affect the nervous and respiratory systems dramatically; touching it causes it to absorb through your skin, taking any pigments with it.
If you use oils, use them sparingly. Most professional paints are already formulated with the optimal pigment-to-binder (oil) ratio.
Walnut oil has been the preferred binder in oil paint for centuries. Linseed is less expensive than walnut oil, which is why it is used more often. But they both work well.

M Graham & Co walnut oil for my initial oil painting washes and medium – this gallon can has lasted 30 years
If you are like most artists who like to use mineral spirits for your initial paint washes – I did for most of my career – the best one to use is Gamsol.
Why don’t I use mineral spirits now? I’m trying to avoid solvents or anything toxic to my health. Also, mineral spirits causes paint to dry matte because it dilutes the oil binder. Varnish will bring back the gloss, but matte colors distort the values and that makes it more difficult to judge values correctly as I continue to paint.
Avoid Spike Oil. I tried some from Natural Pigments (Rublev), and it smells great and flows well but is toxic in large quantities. Spike Oil is a lavender oil similar to what they use in aromatherapy.
The theory was that it was fine because it is an essential oil, and they use it for all kinds of things like Yoga without adverse results. Turpentine is also an essential oil. And they used it for centuries as a medicinal tonic. Now they know how toxic it is to our bodies. When I used Spike oil for washes, my face flushed, and I could feel the negative effects. That is anecdotal and may not affect you, so do your own experiments.
When I want my painting to dry quickly I use a small amount of M Graham’s Walnut Alkyd Medium.
There are other alkyd products like Liquin that many artists love. Liquin dries with a satin sheen rather than a wet-paint gloss. I prefer the gloss. If you use too much walnut alkyd medium, the paint will flatten out and become like glass. Then, future layers of paint will have a tough time adhering and will bead up on the surface. So, use it sparingly.

Turpenoid Natural is amazing for cleaning and conditioning oil paint brushes!
Turpenoid Natural is what I use to clean my paintbrushes. It removes all the paint, including dried-on paint, from my brushes. It is listed as non-toxic, and the little left in my brushes after squeezing with a paper towel won’t harm my paintings.
Turpenoid Natural leaves my brushes nicely conditioned, which helps them last longer than if I used soap and water. It also helps me easily get a razor-sharp edge with my brushes. I haven’t washed my brushes with any type of soap and water in more than a decade.
Safflower and walnut oil, and mineral spirits (Gamsol) are also handy for cleaning brushes but will not deep-clean like Turpenoid Natural. Gamsol is only good for the initial rinsing of wet paint – it will not remove staining or drying paint.
Safflower and walnut oil are wonderful for soaking brushes if you can’t wash them right away. Don’t leave them soaking for longer than a few days, though, or the natural bristles will swell and ruin your brushes.
Painting Panels
ABS and MDF make excellent panels for oil painting. Not all ABS is alike. Each manufacturer uses a slightly different formula. Some panels are stiffer, and some are more flexible. Buy some small panels from a few companies to find what you like. The 2×4-foot, 1/4-inch sheets of MDF from Home Depot are the best I’ve found, and I’ve tried a lot of brands. Larger sheets often need to be specially ordered and don’t tend to be good quality – they warp quickly. Some MDF contains formaldehyde, which will leak into your studio air. The Home Depot panels do not contain formaldehyde. If you don’t have access to Home Depot and your MDF contains formaldehyde (or any wood panel that has formaldehyde), you can use Ecos Air Purifying primer (it used to be called Passivating Primer, as you can see in the image below). It is completely VOC-free – no toxic off-gassing (I don’t need ventilation or a gas mask to prime my panels). The Ecos primer absorbs off-gassing toxins like the formaldehyde in MDF so they won’t leak into your studio. Seal all sides of your panels completely. It usually only takes one coat.

Ecos Passivating (now called Air Purifying) Primer for oil painting panels
If you prefer using acrylic primer because it’s easy to clean up and you don’t have to worry about mineral spirit fumes, use a professional grade acrylic gesso like Utrecht or Golden. Be aware that acrylic gesso is absorbent compared to oil or lead primers, and the paint will not flow smoothly as it does on an oil-primed surface.

Utrecht professional acrylic gesso for sealing oil painting panels
Palette Knives and Scrapers
A good palette knife is very helpful – some of mine I’ve had since art school. It’s tough to find palette knives that are high quality like the older ones. I bought some 15 years ago that bent and dinged easily. RGM Stainless Steel Italian Palette Knife #050 is well made and strong.

A Metal Razor Blade Palette Scraper – this one is a couple of decades old!
The same goes for razor blade palette scrapers. The one I used through art school lasted 20 years. I bought one that looked similar and it fell apart in less than a year. The long-handled Rexbeti razor scraper I mentioned earlier has worked out great. It’s made well and stores extra blades in the handle. The downside is that the blade does not retract.
Paper Towels or Rags:
Scott Shop paper towels are superior to Viva for oil painting because they do not deteriorate easily or leave lint behind.
Scott Shop Original box of 200 My go-to for 20+ years was Viva, but they downgraded the material. Starting about 15 years ago, when I used Viva paper towels to scrub into initial washes, they left fluff behind.
Scott towels are tough and do not disintegrate or leave lint on my panels.
Mostly now, I use rags. Instead of giving old clothes or towels away, I cut them up into squares. They are excellent for brush cleaning or wiping back into my paintings. Rather than taking time away from painting, I cut them up while listening to a podcast or watching an art training video.
Paint Tube Wringer:
Gill Manufacturing Metal Tube Wringer I have used plastic ones as well, but they eventually break. The metal Gill tube wringer is exceptional.
Palette Scraper:
The long handle on this razor scraper is convenient. I have less tendency to get my fingers into the paint on my palette, and I can reach all around my palette easily. The downside is that the razor is not retractable. Notice the rounded edges on the razor. I sanded them so they won’t scratch my palette.
Razor Blade Paint Scraper I like and now use the long-handled razor scraper. For decades, I used the shorter razor scraper, but I tried out the long-handled scraper a year ago and loved it. The only drawback is that the blade is not retractable. But I keep it on a magnet out of the way of fingers, so it works out beautifully.
Leak-Proof Containers for Mediums
Travel container An airtight and leak-proof metal container for Turpenoid Natural, walnut oil, or mineral spirits – whatever you use to clean your brushes.
While traveling, you don’t want to forget a well-made leak-proof container to carry your walnut oil and Turpenoid Natural. The good ones will cost you – but not as much as cheap ones that leak all over your suitcase or paintings!
A leak-proof stainless steel container that is used to store oil painting medium
Paint tube Wringer
A paint tube wringer will pay for itself in no time. I started using this plastic one in the early 90s. Unfortunately, the plastic cracked. Also, it often slipped when squeezing the tube.

Paint tube wringer I have used since the early or mid 90’s
Then I found a metal wringer by the same company – Gill – that gets even more paint out of the tubes. It should last the rest of my life, by the looks of it.
Gill metal paint tube wringer. A good tube wringer will pay for itself pretty quickly.
Conclusion
Hopefully, this oil painter’s supplies list will be helpful for you. If I left anything out, let me know. Experimentation is the key. With time and lots of trial and error, we find art supplies that work well for our particular style and personality. What works for me might not be exactly what you need. After more than 30 years of painting professionally, I still try out new art tools, paint brushes, and paints. I’m always on the lookout for good quality products that will make an artist’s life easier. When I hear of something promising, I usually give it a shot. I aim to have the best quality possible without breaking the bank or overly complicating the painting process. My paintings have stood the test of time so far, and I feel confident that they will continue to do so. One of the things I love about our community is your generosity. You share what works with the rest of us (and what doesn’t work). That saves each of us a lot of time and expense! What are your favorite oil painting supplies, and what are some we should avoid?


Excellent read Bill – thank you so much for sharing! Thank you also for creating this community, all the encouragement and especially the inspiration you provide. Kay from North Carolina
I’m so glad to hear you enjoyed the post and our community Kay – our community of artists is amazing!
This guide is invaluable and I thank you so much. I have tried to print rather that take extensive notes. Unfortunately the print icon only brings up a page 1 of 1. Any suggestions ? Even when using the ctrl and p only page 1 of 1 is available.
Thank you Bill for helping us! Ruth from Tennessee
You’re welcome Ruth!
Have you ever used oleogel as a medium. If you read what some artists have written, they use it throughout the painting pricess. Oiling out. Varnishing. Everything but putting it on their morning toast!
And THANK YOU so much for information that is invaluable! I am moving into oil from watercolor and pastel, though I still love them both.
Great question Avery – I have not used it because most mediums are more of a hassle than a help for me, but the Oleogel sounds like it can be pretty helpful for some artists, especially as a glaze vehicle if they use thin layers of paint and have trouble with the paint becoming too matte looking. I would love to see a painting after a decade or two kept half in the light and half blocked so we can see the long term affects. The reports by artists are positive, but even professional artists are notorious for trusting manufacturers and not really knowing if a product is good long term – not a criticism against artists – we only have one life and I would definitely rather be painting than researching materials, especially since reliable information is tough to come by. My suggestion – if you are painting and trying to achieve a specific effect, like transparency in a hue, and can’t get what you want with straight paint from the tube, then buy a tube of Oleogel and give it a try. I find that keeping things simple for me works better, but I am open to anything that will help me improve the quality of my work. I am a bit leery of adding more linseed oil to my paint (which is what Oleogel is mostly made of with some very fine silica) because it yellows and I don’t know how that increase in linseed will affect my paint colors over time. For the most part, paint is formulated today with a fairly optimal balance of oil to pigment which is why I mostly use extra walnut oil only in the initial washes, and even then I use it sparingly – just enough to make it more fluid, without getting it soupy.
Thank you so very much. Maybe, I have read too much. Lol. It would seem if I just stick with the tube paint only all will be well. At least with the stability of materials! That leaves my head free to create. You are a generous soul. Bless you!
Thank you so much Bill!
This is exactly what I needed.
Blessings!
Amadou
You’re very welcome Amadou!
What is the most basic book you know for the use/technique of oil materials? I keep reading comments made by artists about fat over lean, mediums, etc….I am not sure i am absorbing as much technique as I am becoming confused. Help!!! And thank you for all you do to offer encouragement for new oil painters.
Hi Avery, I just answered this question for you on the Art Books I Love post before I saw your question here – I thought I should paste the same response here for those who might not see it there:
There are a lot of books about materials, but if I had to choose just one it would probably be Alla Prima II: Companion – it is Richard Schmid’s art materials, tools and techniques book that was co-written with Katie Swatland. My hesitation in recommending it is that he paints on lead primed linen which I have a roll of, but do not use because lead primer yellows (which isn’t really a drawback since the yellowing tends to work with colors more than detract and it will lighten when exposed to light) and priming canvas myself with lead primer is a hassle because it takes months to dry enough to use – he also talks about using turpentine which is highly toxic and which I stay far away from (although I believe most of his references to Turpentine are actually meant to refer to Gamsol mineral spirits – he just says Turpentine out of habit). Turpentine is wonderful to paint with, but horrible for our brains and bodies. Another book I purchased a few weeks ago by Simon Fletcher titled The Painter’s Handbook is better informed than most I have read about pigments and their permanence and he covers well what materials to use and what to avoid – the book covers several other media as well like watercolor and acrylic, but the information is easy to understand and more accurate than most others I am familiar with. James Gurney’s Imaginative Realism is a fantastic resource for out of the ordinary techniques like creating models out of clay and other materials to simulate shadows and reflected light for painting purposes when you don’t have the building/s right in front of you.
Also Avery, the important part to know about fat over lean – don’t use mineral spirit washes on top of other paint, only in the initial stages on a fresh canvas or panel – other than that, if you are using paint straight from the tube without mediums you will not need to worry. If one layer dries and you want to add another, you may want to brush a very thin film of oil like walnut oil on it to bring back any paint that has that sunken look – so your values are correct – but you can paint on top of other oil paint without any worry because it will chemically bond to the previous layer. Never use too much extra oil because the oil needs the pigment – like gravel in cement – to give it strength. That’s the reason I don’t use mediums – I don’t trust that I will keep my mixtures in good ratios – also, I just haven’t found them to make my painting experience better than paint as it comes from the tube!
Thanks Bill! I’m in your 6-week course and you were just trying out some of these products. I love having a list as I can use this list to replace things as needed. You’re the best!
So great to hear Linda! I am generally experimenting, so I will update this post periodically as I learn new things.
Thanks Bill for all of the good info. I bought your 6 week course a few months ago and am looking forward to diving into it in a few weeks. Unfortunately a total knee replacement for my husband and arthroscopic meniscus repair on my knee have prevented me from painting very much for the better part of 2017. But, it’s a new year and a new attitude for me. So…..a trip to care for my mother for a week, then taxes get done and then painting!!!! Hope to join the monthly group soon, also. Again, thank you for all of your guidance and encouragement. Cindy Harris
Yikes Cindy, so sorry to hear about the life struggles – I hope 2018 is a stellar year for you, your family and your painting pursuits!
HI Bill. Thank you for the info. Which outdoor umbrella do you use for Plein Aire
Susan Flanigan
I have two – one I purchased about 20 years ago from an art supply store that does not have the brand listed anywhere on the umbrella – it is about 4 feet in diameter and comes in a black canvas carrying case with a heavy duty clamp for attaching to my easel or a wood handle for holding by hand. The other I bought last fall to help with filming the plein air course – I had gotten out of the habit of using an umbrella because I generally turn my painting and palette so the light source is right on both, rather than shading my painting – especially since even a small gust of wind can cause problems when an umbrella is attached to the easel. The one I just purchased is a photography umbrella and I quickly discovered the post is not strong in even a small breeze – but the umbrella itself is wonderful – it is 7 feet in diameter and diffuses the light beautifully. You can find it here – https://www.amazon.com/gp/product/B00AE1M1G6/ref=oh_aui_detailpage_o09_s01?ie=UTF8&psc=1 – I attach it to a separate tripod with a photography attachment, so it is not convenient for most artists. If I wanted to use a smaller umbrella on a regular basis I would probably buy a simple windproof golf umbrella (http://www.umbrellaheaven.com/product/budget-storm-golf-umbrella-white/) and attach it to a tripod that I could stake into the ground using the Orange Screws listed above and a photography clamp like this – https://www.amazon.com/Neewer-Studio-Practical-Durable-Umbrella/dp/B00QRRVX3I/ref=sr_1_cc_1?s=aps&ie=UTF8&qid=1519930736&sr=1-1-catcorr&keywords=photo+umbrella+clamp. Thank you for asking about umbrellas – I need to add some info to the blog about this because most art umbrellas are overpriced and many don’t know of other alternatives or they think the art umbrellas are ‘special’ for painting. I prefer the light diffusing white to the light blocking art umbrellas.
Hey Bill. Where does one buy the Eco primer for oil canva?
Pamela, if you click on the words in the blog you will find that they are a link to the website for each product. Click on ‘Ecos Passivating Primer’ and it will go to the site I purchase from.
Thank you for this excellent supply list. I find that I have mot of the items and jut need to purchase a few. Can’t wait until your video course is available on DVD. Best regards, Cat
Glad to hear you’ve got the supplies you need to create some beautiful artwork Cat. We hope to have the DVD’s available soon – will let you know.
Thank you Bill – I am hoping to change to oil. It’s a process finishing the bulk of ones acrylics. But I have taken the info from your notes and will plod on adding one or two oils at a time.
I am also enjoying your 6week course.
I am mighty slow – that’s all I can say!
There’s nothing wrong with being slow Belinda – it’s not a race, it’s a journey! George Carlson, who’s paintings sell quickly for upwards of $90,000, produces only about 7 a year. He doesn’t seem to be in any hurry. I’m glad to hear the course is helping. Happy Painting Belinda 🙂
Hi Bill, Thank you so much for the valuable information you share with us. I wanted to let you know that when I click on the link to the ECOS Passivating Primer it goes to ECOS Interior Atmosphere Purifying Primer. When I search their site for Passivating Primer, it says “no results found”. I just wanted to be sure I am looking at the right product that has possibly suffered a name change. lol I do say that the one it takes me to says good for MDF board but sometimes I know when a name change takes place, it will occur with a change in formula.
Thank you for letting me know about that Julie! I happened to go to the site yesterday and saw the same thing. I have not had a chance to research whether the formula is different or not. Maybe they changed the name because ‘Passivating’ is harder to understand for so many. Hopefully everything else is the same or better.
Hi BIll,
I just want to clear up a question that has been driving me nuts. If I use a walnut/paint wash for an initial wash/underpainting, won’t that be breaking the fat over lean rule when I apply the next layer of paint?
Thanks for clearing this up.
Kathy Martinez
Great question Kathy! I rarely think about fat over lean because I paint mostly alla prima and everything mixes as I go. The fat over lean idea is much more important to think about when someone is using something like mineral spirits which reduces the ‘fat’ or oil content of the paints. Since I use straight paint without any medium or mineral spirits through most of my painting it is already fat right out of the tube (although some colors are more fat than others). It is also something to think about when painting over dried layers – some paint, like umber, may possibly crack if scumbled over thick impasto paint. When I use walnut oil for my washes I am using only a small amount so the oil doesn’t fill up the tooth of my primer – that said, at least one historical artist used oil washes that were soupy and his paintings have not had any problems 100 years later. If someone uses ‘lean’ paint over fat the lean paint will crack – I have not had that problem ever that I am aware of.
Thanks for posting this great info. Gamblin also offers a better selection of transparent color, ie Sap Green, in my opinion.
You have great information and helpful hints here. I’ve learned a lot just reading it. My question is there one Walnut Oil that you
recommend that’s superior over another. Some are more expensive than others but I know that doesn’t necessarily mean better quality.
What are your thoughts please?
Hi Lyndy, I am referring you to a blog I wrote about using Walnut Oil. It has the brand I use in it. Let me know if this doesn’t answer your question! https://www.masteroilpainting.com/is-walnut-oil-really-a-substitute-for-mineral-spirits/
I’m so glad I found your site. I’m stunned by how beautiful your works is, and I so appreciate all the helpful tips and insights. I’ve heard and seen lots of instruction on composition, in particular, but you’ve broken it down in such an understandable way! Lastly, thank you for the link to Wind River and Rosemary & Co. I’m always put off of buying directly because the shipping can cost more than the item I want to buy!
Than you!
Explore nude bdsm at Cupidbaba, featuring elegant lingerie, bodywear, and intimate apparel in versatile nude shades. Crafted with premium materials for comfort and style, each piece offers a flattering fit, refined design, and lasting quality for confident everyday wear.